The QRACCESS web dashboard manual
A step-by-step guide to the control panel, with real screenshots of every section. No jargon here: just what you will see on screen and what each option does, from the moment you log in until your event is ready to control access.
The examples use a sample event, "Congreso de Innovación 2026", so the screens look just like what you will see in your own account.
What you will find in this manual
Access
Log in to the dashboard and move around the menu.
Groups
Create the container for your event and its actions.
Assistants
View, search and manage people and their QR codes.
Adding and importing
Add assistants by hand or from an Excel file.
Fields
Define what data each assistant has.
Account
Your account settings: email, SMS and payment gateway.
Event
How the door behaves with each QR code.
Configuration
Registration mode, online/offline and alerts.
Readers
Who validates at the entrance, with limited permissions.
Records
The access history, filterable and exportable.
1. Accessing the dashboard
The dashboard is at control.qraccess.com. It opens in any browser, with nothing to install.
- Enter your email and password. For security, the platform will ask you for a verification code that you will receive by email: type it in to log in.
- At the top right you can change the language (Spanish, English, French, Catalan, Basque and Galician) and switch between light and dark mode.
- Everything you manage —groups, assistants, events— hangs from the menu on the left.
2. Groups: the container for your event
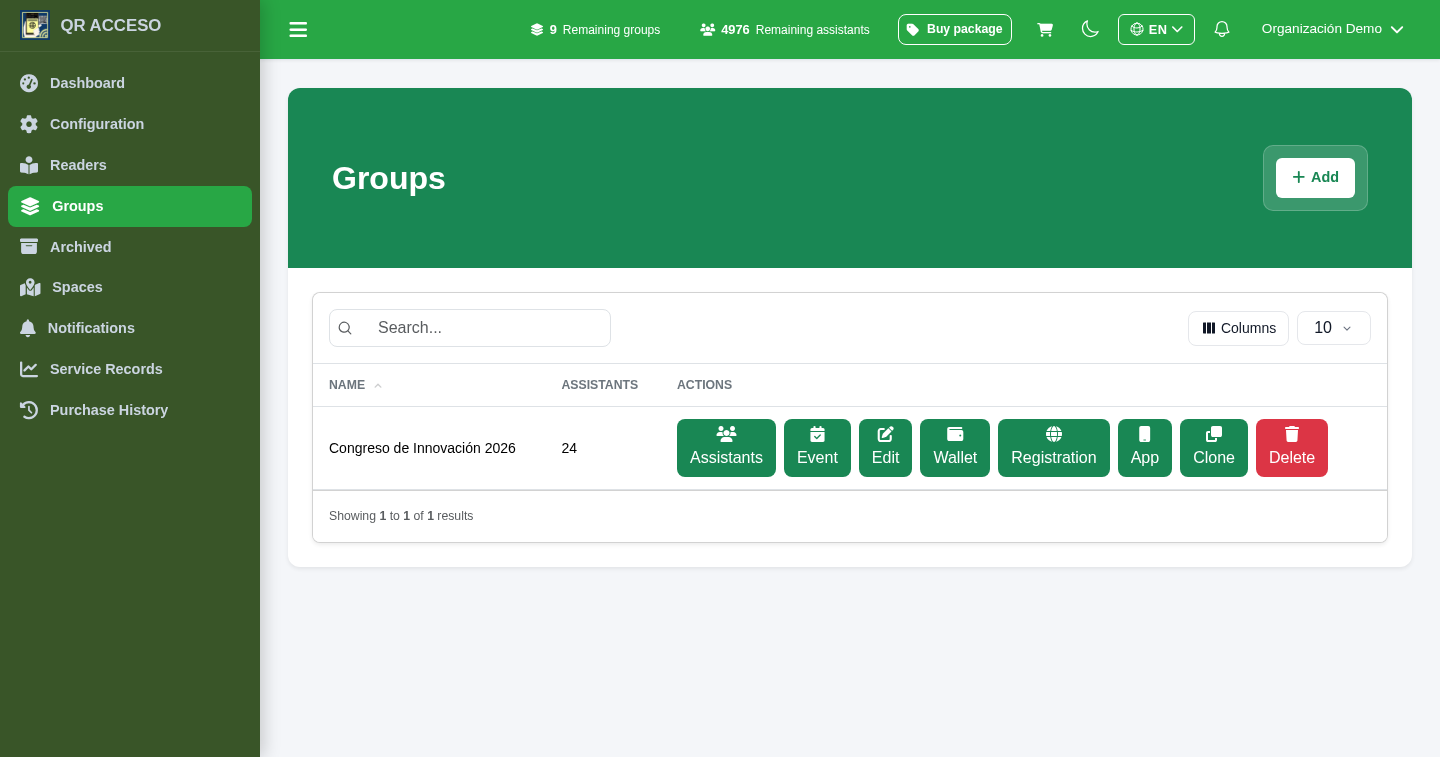
A group brings together your assistants, their data and the configuration. From Groups you see all of yours and, in each row, the buttons to work with it.
- Assistants: the list of people in the group.
- Event: how the door behaves (counting, alerts, schedules).
- Edit: name, language and the data fields.
- Wallet, Registration and App: mobile passes, the sign-up website and app options.
- Clone: duplicate the group for a new edition of the same event.
3. Assistants: the people and their QR codes
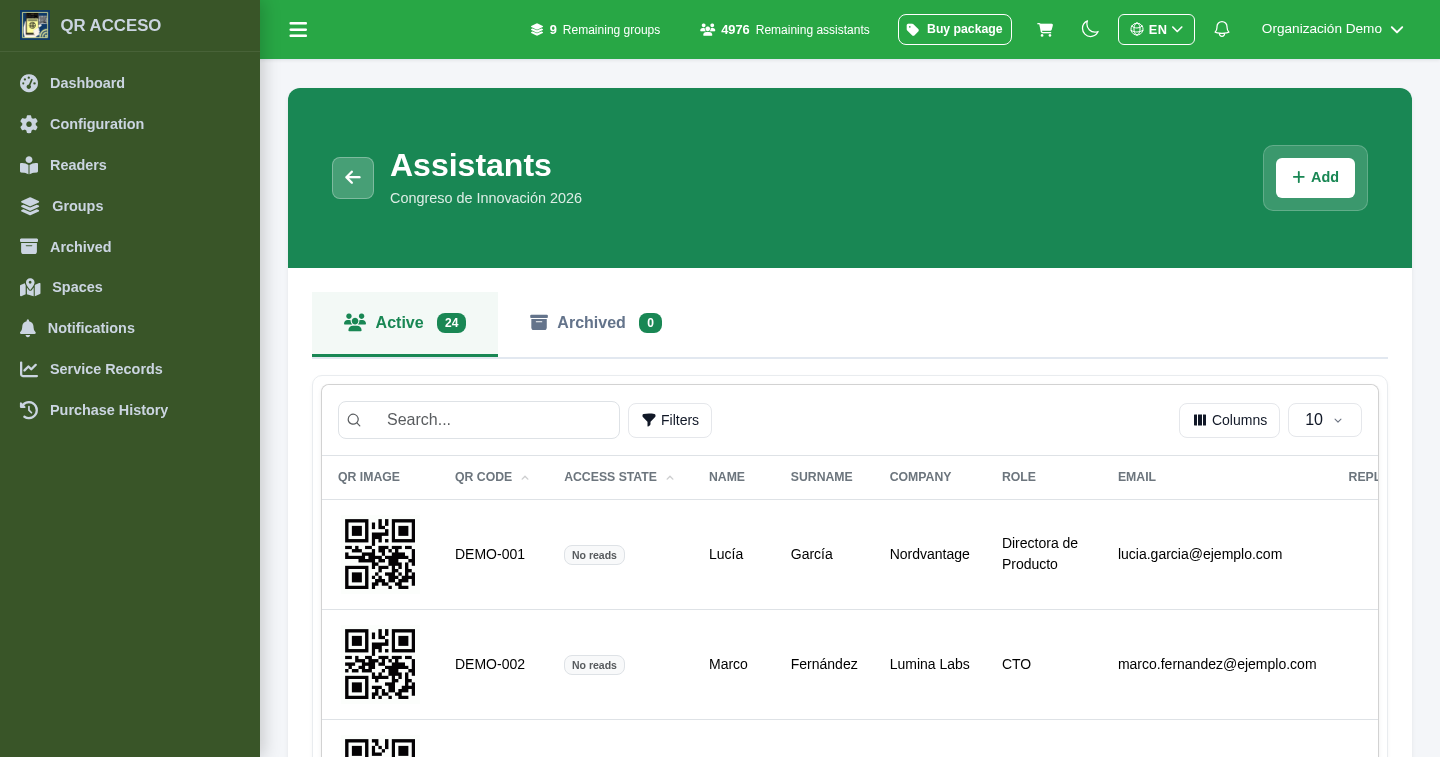
Each assistant has their own QR code and the data you have defined. From here you view them, search them and manage them.
- The Access status column shows whether the person has already passed through the door or is still "No readings".
- Use the search box to find someone by any of their data, and Columns to choose what is shown.
- The Active / Archived tab separates those taking part from those you have already put away.
- The counter next to "Active" tells you how many assistants there are in total.
4. Adding and importing assistants
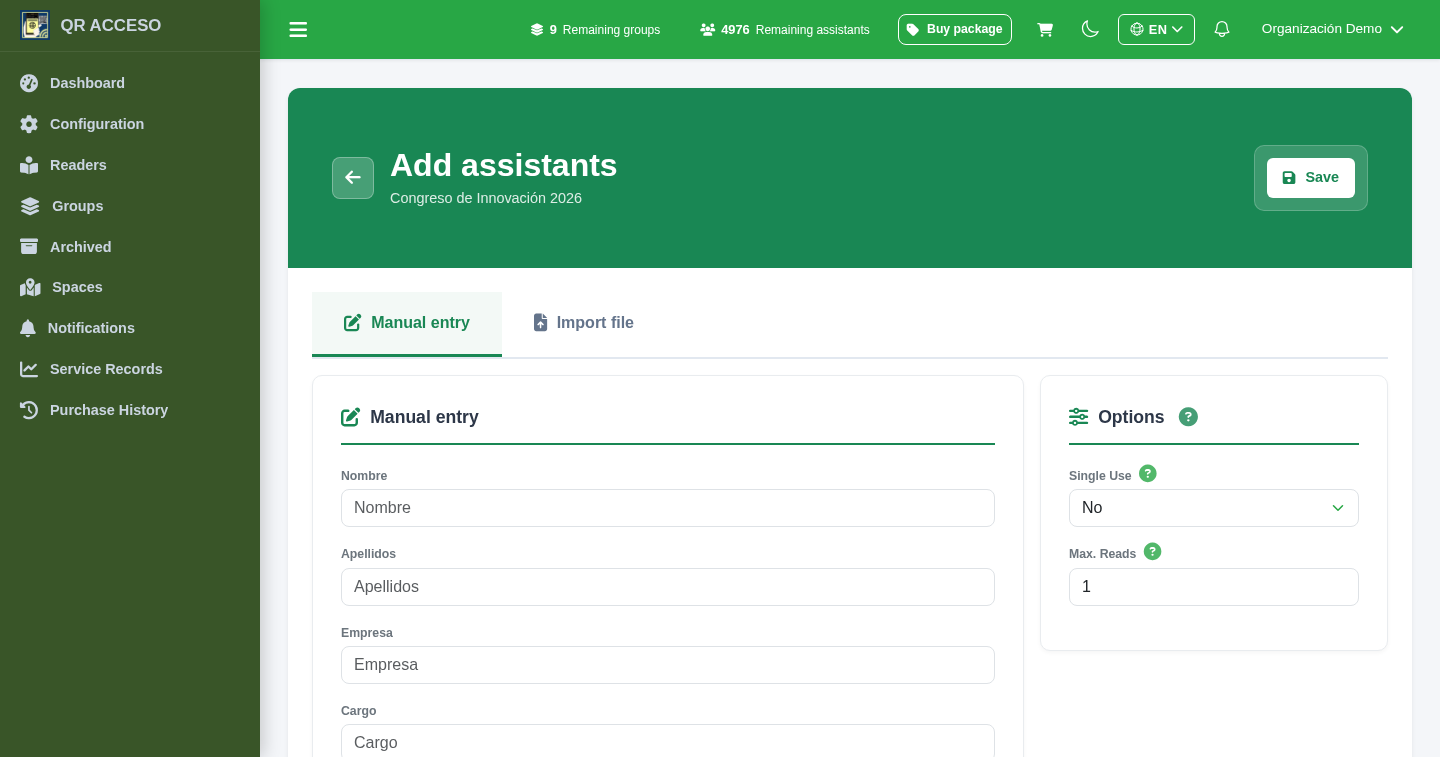
You can add people one at a time or upload many at once from a file.
- The Add button opens the sign-up form with your fields.
- For large uploads, import from Excel or CSV: the columns are matched to your fields and each person's QR code is generated.
- If your assistants already come with their own code, you can use that external QR instead of generating a new one.
- The platform warns you about duplicates so you never count anyone twice.
5. Fields: what data each assistant has
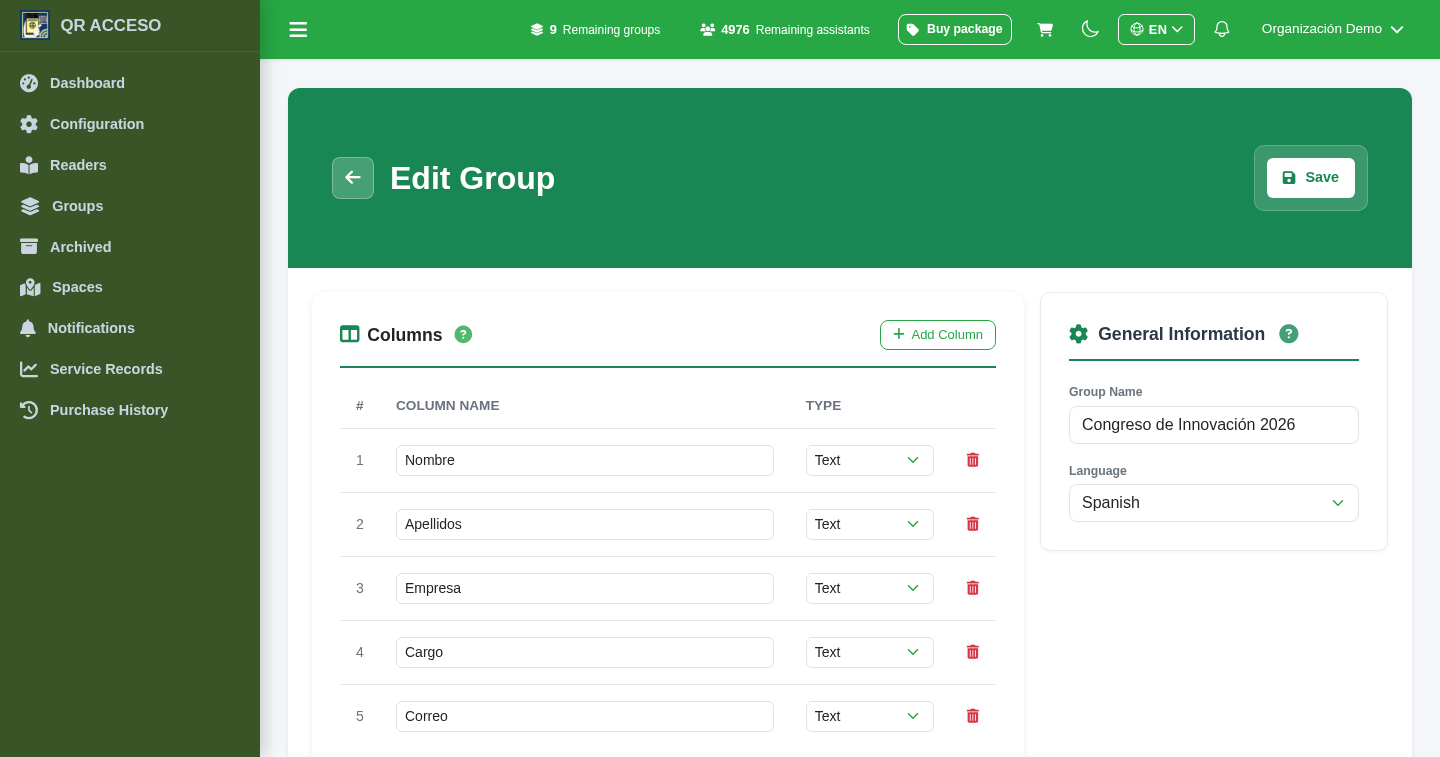
An assistant's data is not fixed: you define it. From Edit group you decide which fields exist and how they behave.
- Add the fields you need (name, company, job title, email…) and order them.
- Mark which ones are required, which must be unique (such as the email) and which appear in the app and in the history.
- Each field can be translated, so that whoever signs up sees the form in their own language.
6. Configuring your account
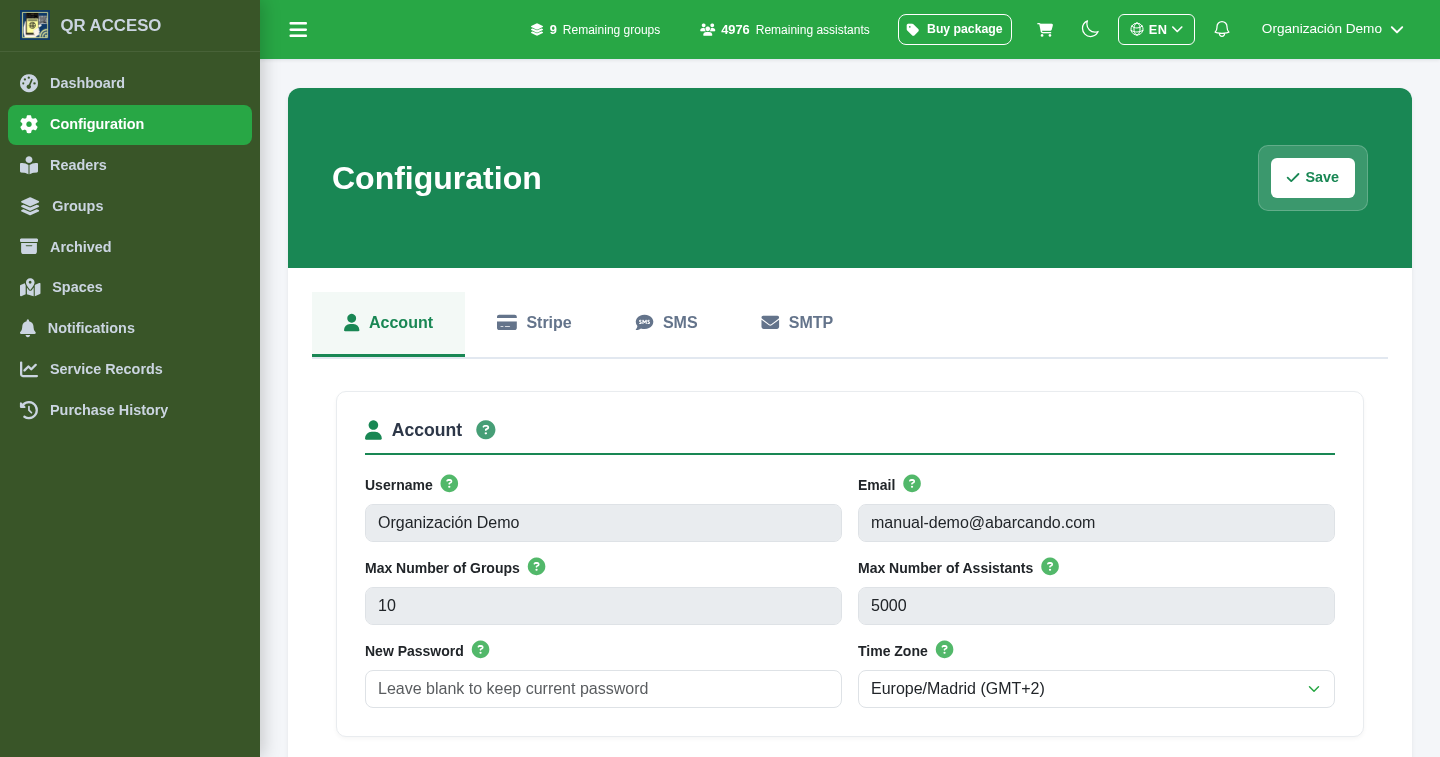
In Configuration you will find the settings that affect your whole account, not a specific event.
- Your details: name and login email. Some settings can only be changed by the platform administrator.
- Email (SMTP): you can use your own server so that messages are sent from your domain.
- SMS: credentials to send text messages to assistants.
- Payment: connect your gateway account to charge for tickets through the platform.
7. The event: how the door behaves
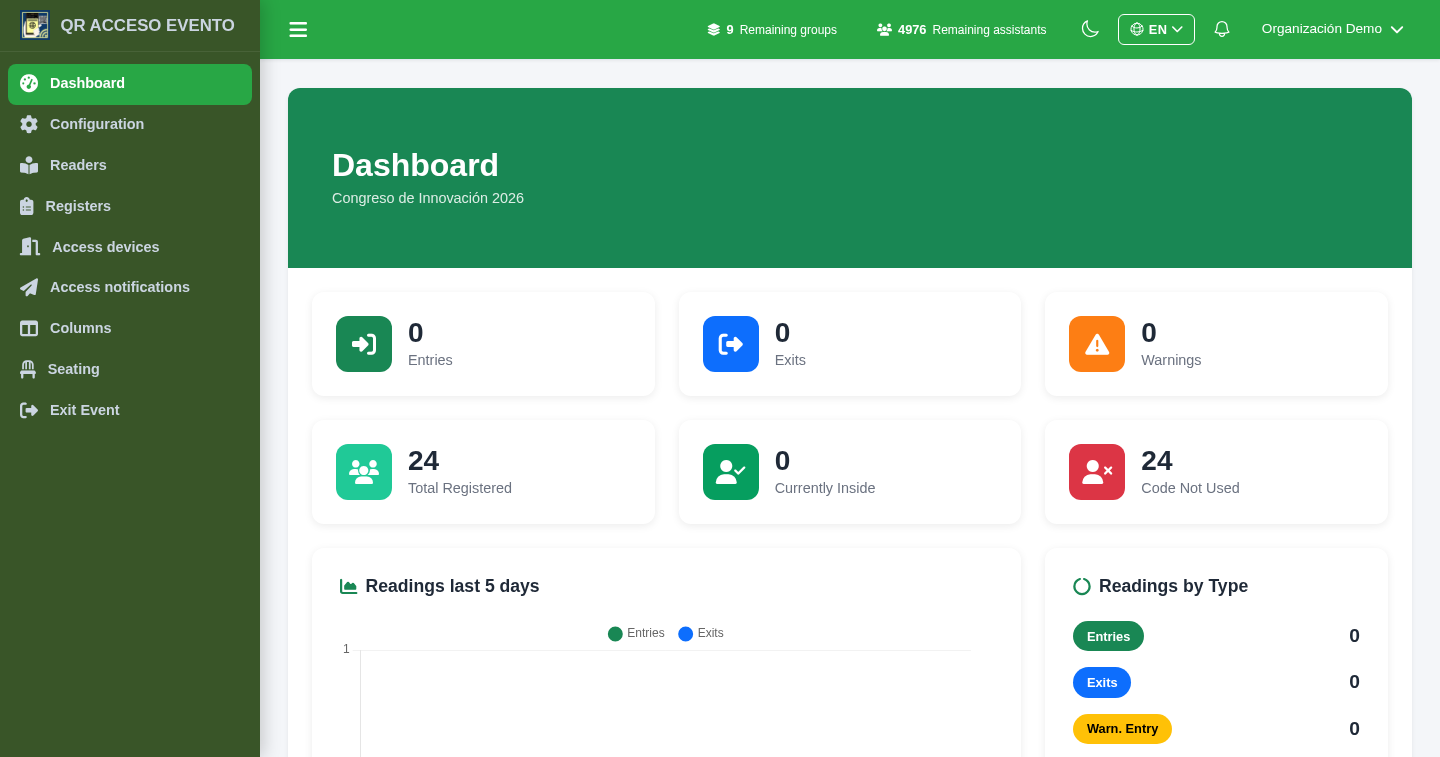
From a group's Event button you enter its access configuration. This is where you define what happens when someone presents their QR at the entrance.
- You see the Event information at a glance: name, location, dates, schedule and time zone.
- The side menu switches to the event's: Configuration, Readers, Records, Devices, Alerts, Columns and Spaces.
- With Exit the Event you return to your groups.
8. Event configuration
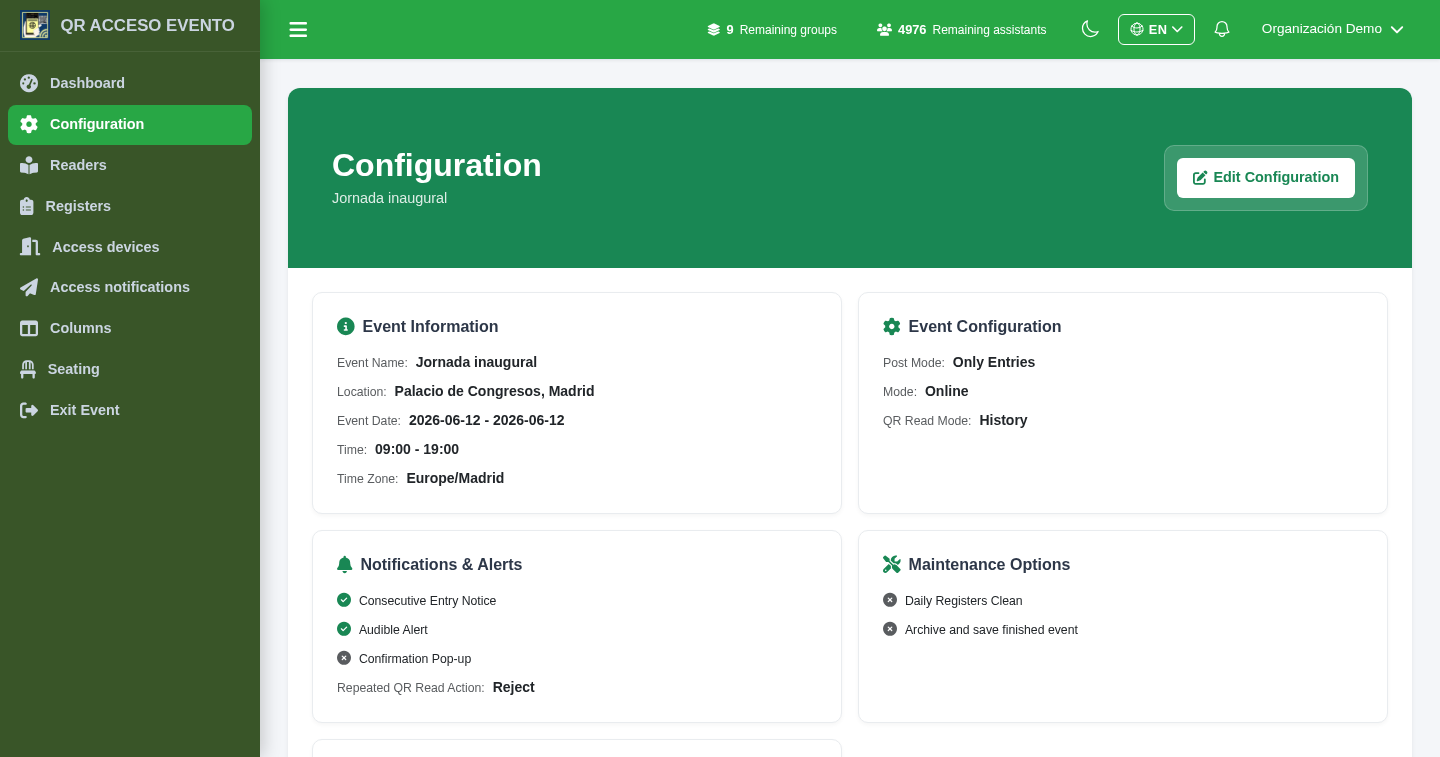
Here you decide how accesses are counted and what the app alerts about. Everything is summarized in cards and edited with Edit configuration.
- Registration mode: entries only, entry and exit, or continuous QR scanning (the fastest, it records without pressing any buttons).
- Online / offline mode: online makes sure no one enters twice through different doors; offline works without coverage and syncs afterwards.
- Time zone: all the event's times are interpreted in it, even if your readers are in different zones.
- Alerts: repeated entry, exit without entry, sound alert and the QR's validity time window.
9. Readers: who validates at the door
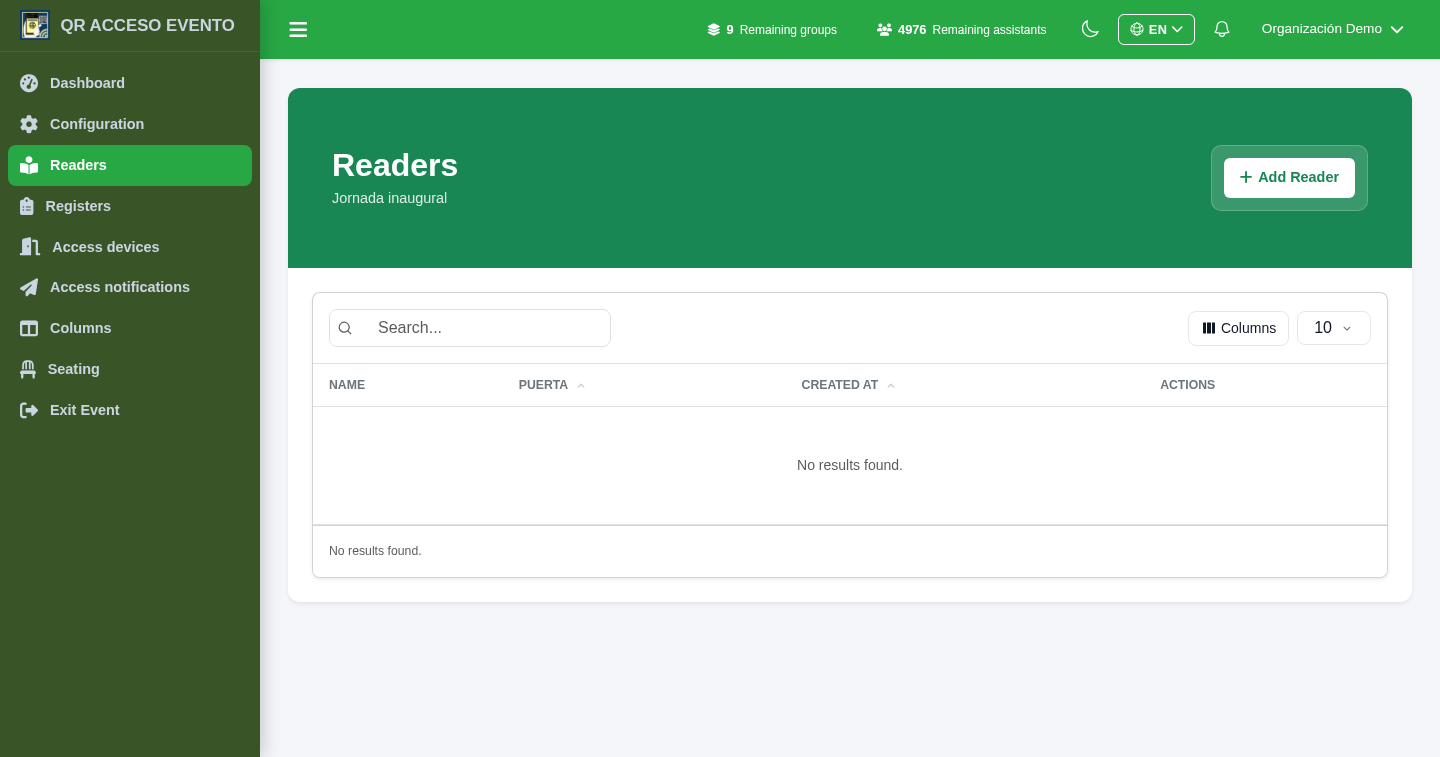
A reader is an account that uses the app at the entrance, with limited permissions. This way the access staff do not need to enter the full administration area.
- Create readers with an email and password and assign them to the event.
- A single reader account can be used from several tablets at once; each device is identified in the statistics.
- You define which of the assistant's data the reader sees in the app and in the history.
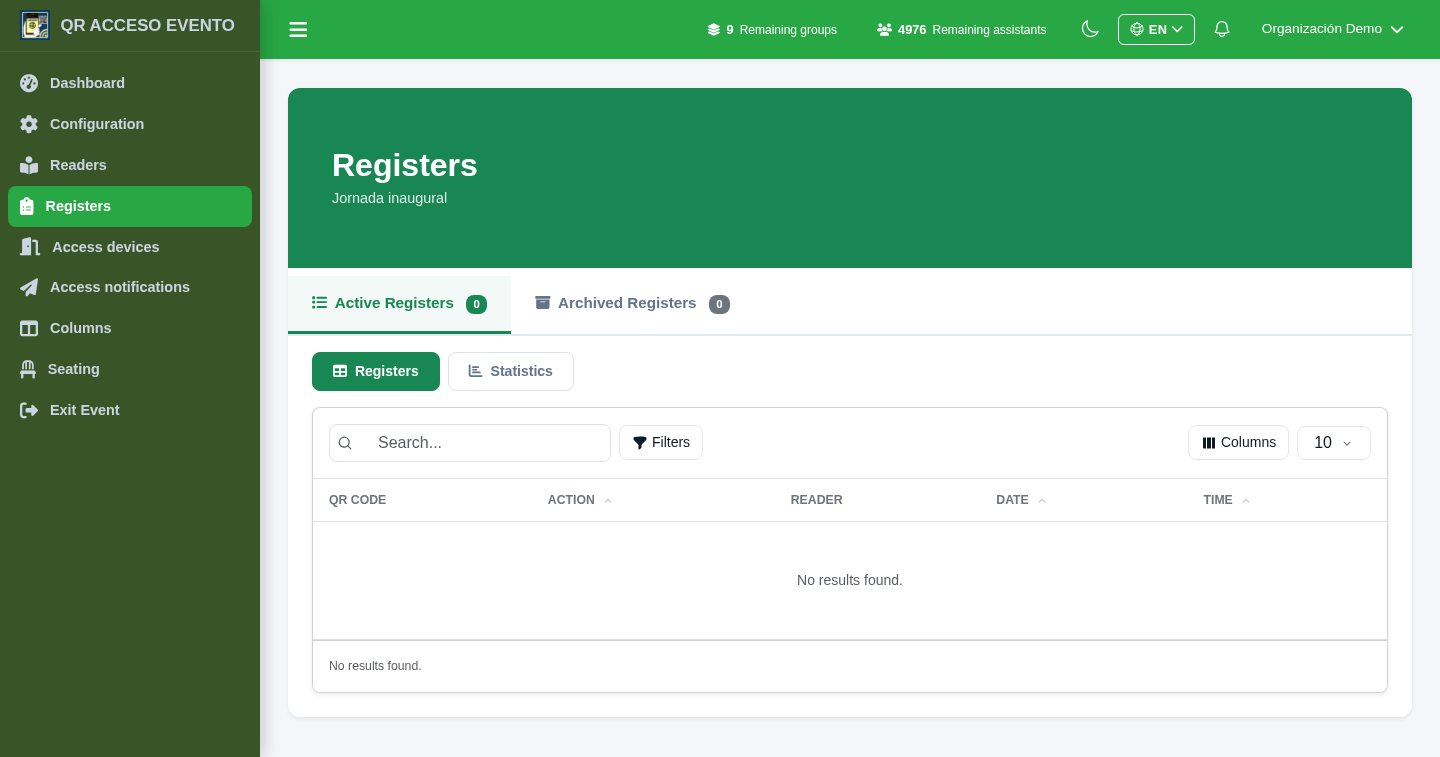
10. Records: the access history
Every QR reading is recorded. In Records you see who has entered, when and through which door, and you can export it.
- Filter and search by assistant, reader or status.
- Times are shown in the event's time zone, both on screen and in the exports.
- To keep the system fast, old readings can be archived: they are not deleted, they are moved to the history.
And there's more…
When your event sells numbered seats or zones, the space designer comes into play. It has its own guide:
Spaces and venues manual Ticket sales (Tickets10) See all the guides
Would you like to try QRACCESS at your next event?
Create an account and start setting up your first event from the web control panel.
Control panel: https://control.qraccess.com